What’s involved in creating your own custom doll head?
Mishka has documented the entire process of working with us to customize a doll head! From using AI tools to design an unique head, to refining image details, to beginning the customization process with us, including confirming the 3D model design, creating internal and external molds, and adding makeup with final approval, he covers the complete customization journey!
You can read the full article here: https://www.coeros.com/designing-and-cu … doll-head/
Below is the detailed content:
Overview
Ever wondered how silicone doll heads are made, or have you ever thought about designing and having your very own silicone doll head made? In this blog, I will go over the process and show how you too can have your very own custom sex doll head made, and what steps are needed from start to finish. In reality, this is a multi-step process that requires you to design a face (from a picture you own or via generative A.I). I will show how that’s done as well. The next step will require professional help from Coeros, who will take the photo concept and design a 3D model. After the design stage, the mold is made and silicone is poured. The design team will then prep the casted silicone head and start to paint it, add eyelashes, inner mouth parts, and eyeballs. You get to select the eyecolor and whether the head will have articulated mouth parts (ROS), implanted eyelashes eyebrows and hair (as well as hair color). – even decide on the silicone hardness. From concept to final head production, Coeros will guide you through the process and using their partners for the production of your silicone doll head.
STEP 1 – Designing Your Head
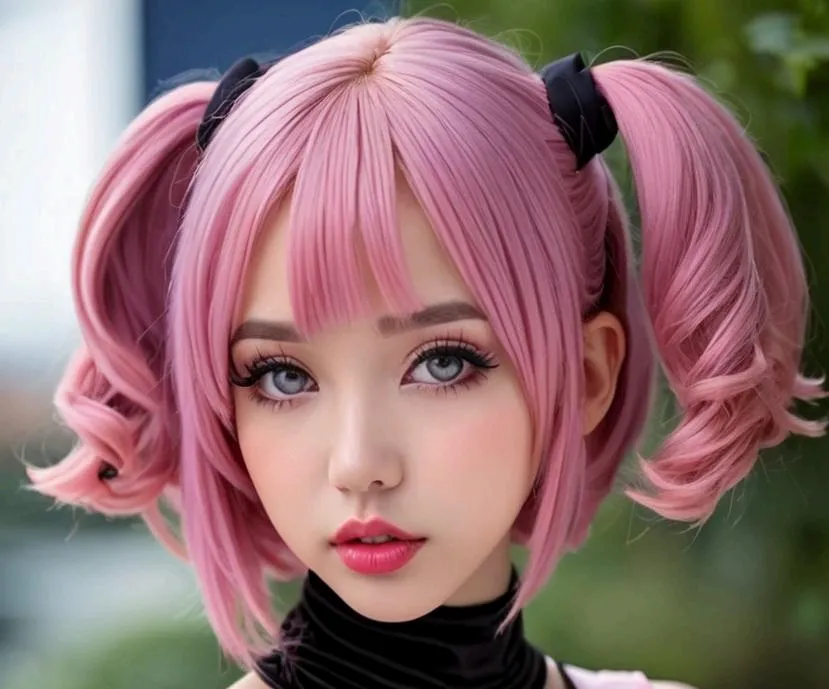
The steps I think are the best way to design a face is to use generative AI, and come up with a few concepts. This allows you to not infringe on copyrighted faces and actual people. I went this route and you can use any online tools available such as Canva. For additional editing, you can use Photoshop to add special details. I added freckles, lipstick, and eyeshadow, and it is possible to save this image, and use a.i again to improve the face to your liking. (This AI process is called image to image).
Figure 1a, b. Early Design Concepts

STEP 2 – Improving and Adding Features
l used Photoshop to add a 2-tone lipstick color, that is based on a few Cosplay girls I have seen and the pink bob hair with twin tails is the hair color and style I chose. Although in my case, I will use a wig based on that idea, I did not want implanted hair because that requires a harder silicone, and I wanted a soft head with ROS capability, but I could get implanted eyelashes and eyebrows – which I highly recommend you do as well. Additionally, I added rose blush and tinted eyeliner to accentuate her more. Below are my before and after renderings from photoshop.


STEP 3 – Submitting the Photos for Production
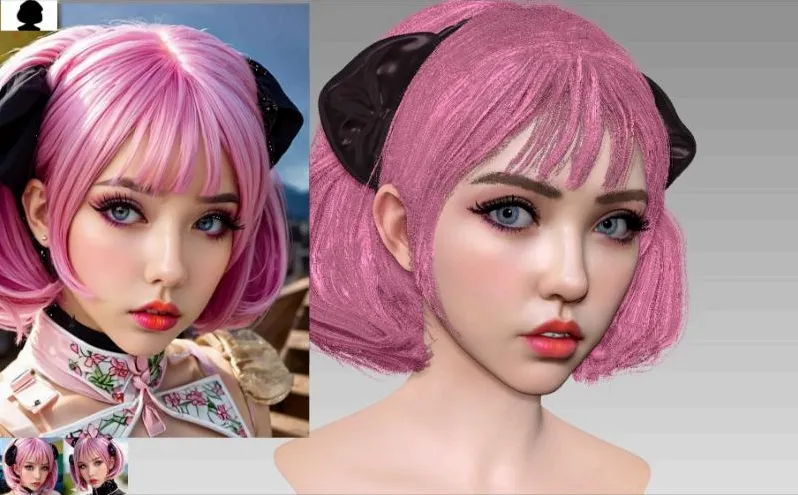
After you have your photos ready, you send them off the Coeros to their evaluation and design team. Here they will make suggestions and generate a 3D model that is textured for you to look at. Using this model, you have to give feedback and suggestions on what changes you want. In my case, I had a variety of changes that included more details to the ear, nose, rotation and size of the eyes (14 mm Iris), and shape of the mouth and lips (Pouty look). These are done in an iterative manner, so your feedback gets incorporated in the design, and a new model will be created for your review. In my case, I made a few videos to describe the changes and that helped convey the ideas better. They say a picture is worth a thousand words.
Figure 2a, b. Conveying changes to the 3D model

STEP 4 – Moulding Process
The final steps are now in the hands of Coeros and their design team to implement the 3D model into reality. The steps are first to make an inner and outer mould to hold the liquid silicone when it is poured.
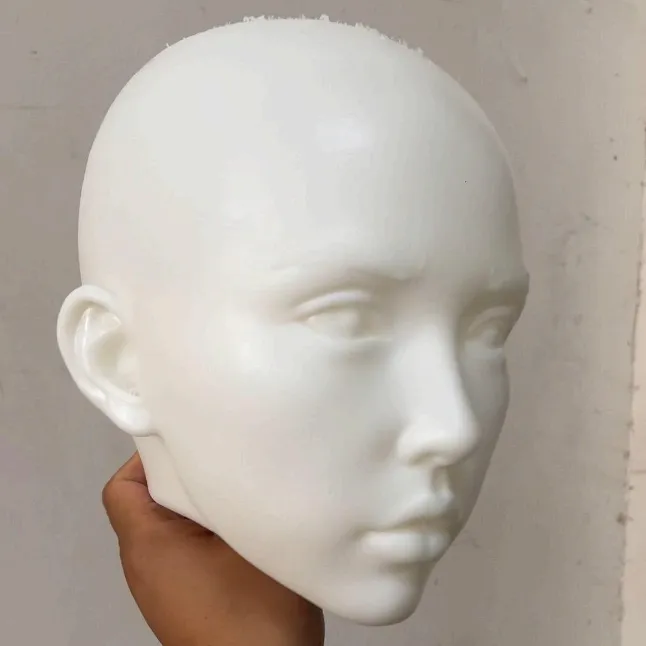
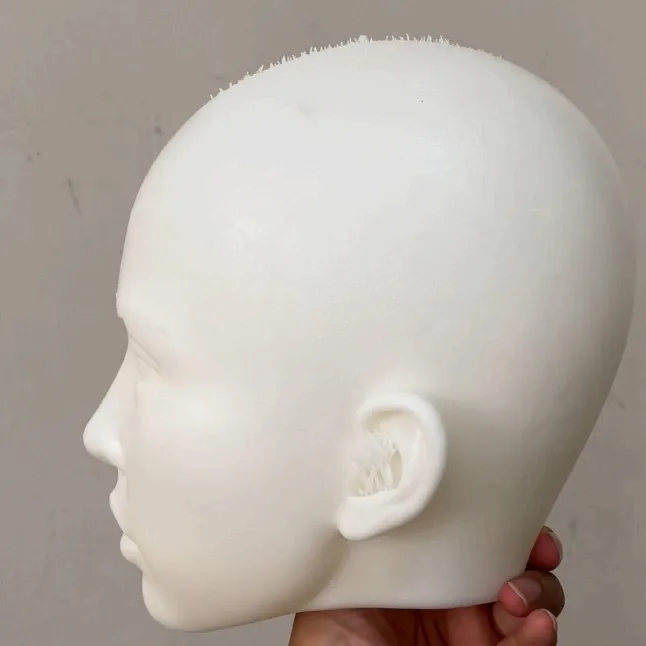
Once the silicone is poured, you will have what is called a positive, and this will be your final head that will be demoulded from the negative.
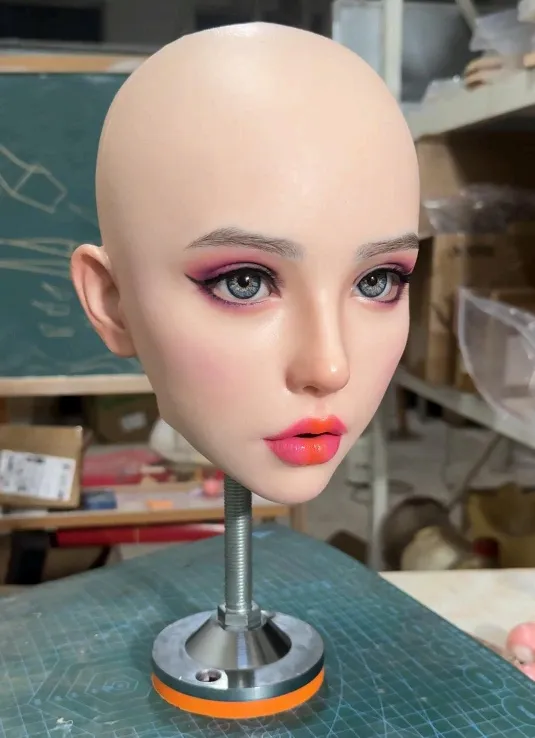
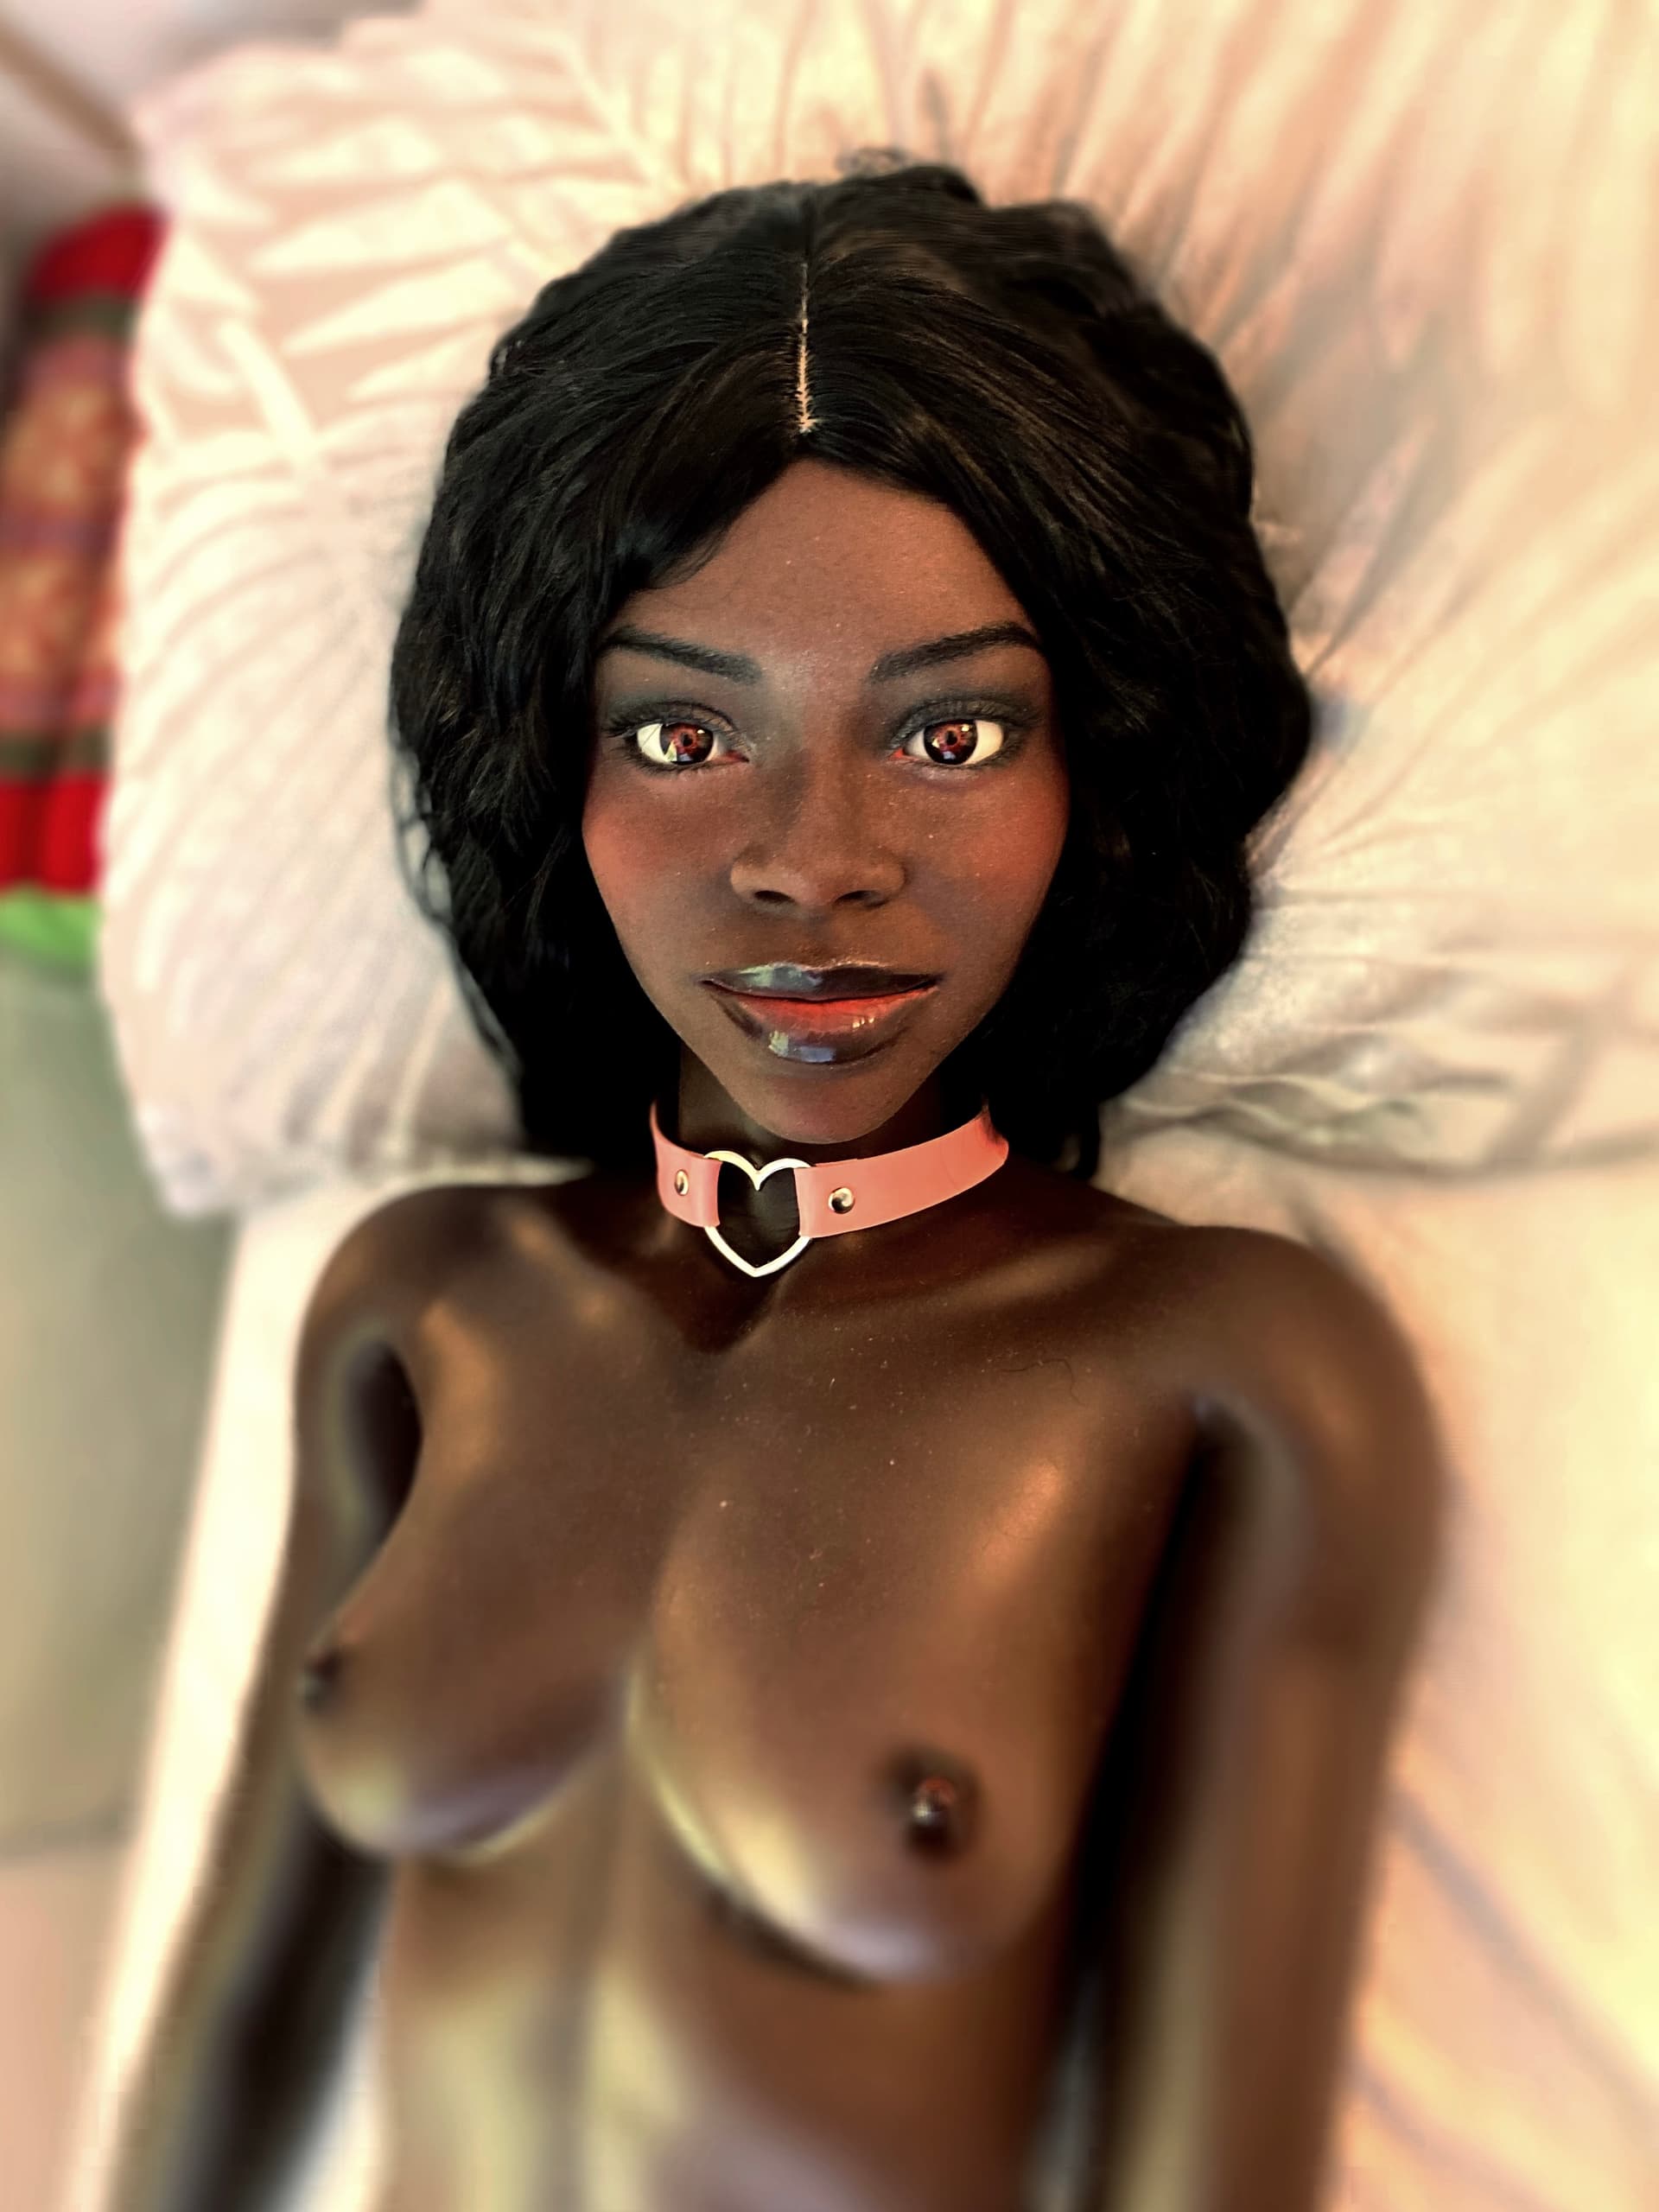
In this picture, you can see the head after makeup artists have prepped and painted the face to resemble your photo. Looks very good doesn’t it?
I feel the resemblance is very authentic to the original concept art, and it makes me feel good that this is possible today. In the future, I have more ideas for a new head!

STEP 5 – Final Approval
The wait is over, and anticipation draws near as you wait to have the factory photos of your custom head! – The process from your submission to receiving the doll head takes several months. It’s actually not bad, considering the time and expertise required to do this on a small one-off scale. I did not mention it earlier, but I did give rights to Coeros to sell the head to customers who may want the same one for themselves.This does offer the advantage of less cost to me and much lower cost if I ever want to have one remade – since they have the mould already.
My Impressions and Review of the process
At first I was skeptical that a head based on my design could be manufactured based on provided photos. I was pretty firm on my expectations, and at first the first 3D model provided did not exactly match the images. Over the course of time, and several iterations later, the 3D head started to match the photos very well, and we continued to improve the result more. During this time Coeros communicated the specifications and requirements very well to their partners, and I am very happy with the quality of communications and I would suggest anyone doing this, to specify very exact details and what they need to the team. Very small details can be communicated well to Coeros, as they fully understand what’s needed, and the end result shows this. Just remember the first iteration will be close and you will need to address all changes desired. I communicated subtle and more acute changes like more teardrop eye angles, a smaller nose, more details in the ears, more puffy lips, and more open lips with pronounced teeth showing. More acute things like head shape ratios – i.e 10% wider and less vertically oblong can totally transform your head. Things like this need to be addressed with each iteration, until you are fully satisfied. The team also provides an animated 3D figure that you use to make informed decisions. That being said, the results are really amazing and left me quite speechless after seeing her. I spent much time trying on various wigs, but ultimately settled on the wig they provided me for these photos. I did style the hair better, but it’s very close to what the factory provided. Also, the makeup is exact, and I mean true to the images provided. I did not add any more makeup except for eyeliner and lip glitter and gloss – but wow, am I impressed! Those in the doll world know me as a youtuber, and doll photographer who does promos for various companies, and I have a studio and good lighting to show her off. I am going to really enjoy this head immensely, and have a Xmas photo shoot planned. For those wondering what doll body I am using – it’s the RealLady 159cm, and she’s an exact match!
Addendum
I sent Coeros a RealLady head matched to the 159cm doll I have – and with this head, they color and size matched the custom sex doll head. I think this is not a critical step, but in the event you cannot have a factory ship a head from the exact manufacturer, you will need to measure the size of head you want made. I mean you need horizontal and vertical dimensions and show a photo of the head so they can match the profile. Keep in mind if you submit a photo of a head with wider proportions (rounder) it will look younger, and you can adjust this during the communication with Coeros. The maturity of the head should match the size (and girth) of the body so it will not look awkward. These few things should be addressed before attempting to have a custom head made. Another fact to consider for proper color matching is to provide a photo of your donor body you want to color match. I would look at buying a photo grey/neutral card and photo the body against a neutral light of around 5200K (most LED lights do this), and use the grey card in the photo, so the factory can color match properly. A cell phone will work fine. Oh, by the way, if you want this head, I believe it is available for order!
Features
Soft Silicone (I mean very kissable!)
Implanted eyebrows, Eyelashes
ROS (Articulated Jaw) – absolutely essential option!!
Detailed fully functional mouth internals
Rotating/Push 2 Turn 14 mm Eyes – These are absolutely fantastic!
Optional enhanced makeup – Absolutely get this option!


About the Author
This article was written by Mishka on September 24, 2025. Below is a personal introduction about Mishka:
I am a photographer with a deep-rooted passion for capturing dolls since 2014. Initially drawn to TPE dolls, I later switched my focus to posing them for photos, using a Nikon D300 before upgrading to a Sony a7RIV. Over the past decade, I have had the privilege of photographing dolls for various companies and watched the industry evolve with better improvements each year. I saw this as an opportunity to invest in more lifelike dolls, appreciating their improved detail and realism. For the last five years I have been traveling extensively across the US, in my camper van loaded with dolls which I photographed at various roadside locations. Currently, I have about a dozen dolls posed around my house and often host larger doll meets, fostering friendships within this unique hobby. My experiences traveling and photographing these dolls have led to unique connections with others who share the similar interests, forming a tight-knit community in this niche hobby.


 .
.